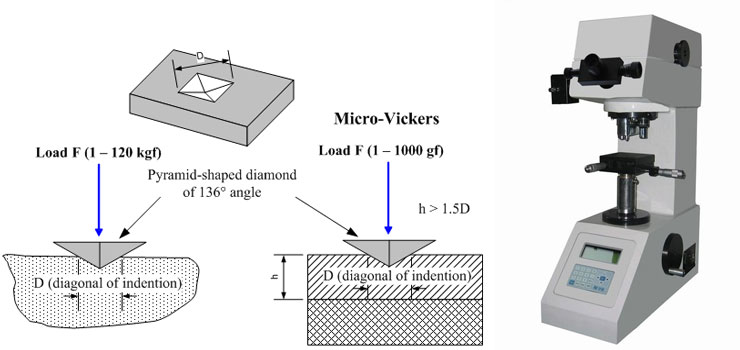
Objective: For assessment of Vickers Hardness number for given sample
Tools and Equipment
- Pyramid indentor
- Vicker’s hardness tester
Description of Machine
The main of the equipment is completely covered by covers and the parts of machinery lying on the inside of the machine is consequently sheltered from chart and other different unwanted elements. The rudimentary system is one of levers and weight. The load is exerted by consistent weights with help of a lever. The time period of the test is regulated by an adaptable electronic timer.
Principle and Theory
Set up the equipment to the necessary point of test load and dwell time period. Position the specimen with great care on the testing table. Now regulate the objective to the “set” position. Turn the hand wheel gradually in the clockwise course so that the sample gets itself focused on the front screen with great precision. After that, bring the inventor to “set” position and turn on and repeat the process of loading dwell- unloading cycle. Now, bring back the objective back to the “set” position. The dent is now indicated on the front focusing screen. Measure and compute the dimensions and diagonals alongside both the axes of the impression and mark them down.
Result
Vicker’s Hardness number Hv=
Note: the depth of the sample has to be minimum 10 times the thickness of impression anticipated
The diameter of impression has to range inside 0.2- 0.7 times the ball diameter D
Questions
1. Is Flow hardness is connected to tensile strength of the material.
2. What do you mean by Vickers Hardness number. How is it calculated.
3. Which Hardness test is comparatively preferred more for testing finished component?

